A pretty good guide to pretty good privacy
In the past week, I've been experimenting with PGP, or GPG in particular. In a nutshell, PGP is an encryption standard with a wide range of use cases. For quite some time, I didn't see the point of keeping a PGP keypair. It seemed like a burden to securely keep track of the key(s). Once you loose it, you will loose the trust of others. But after doing some research on the topic, I found that it's not actually that much of a hassle, while giving you many benefits.
The Why
The most obvious benefit is encrypting and decrypting messages and files. If you upload your public key, I can encrypt our private conversations. Nobody will be able to read what we're chatting about. If you fear that cloud providers will read through your documents, you can also go ahead and encrypt all of your data with your keypair.
But PGP is not just about encryption. A keypair also gives you a proof of identity. If I see that a piece of work is signed by you, I can be certain that you and only you have worked on this. By signing the keys of people we trust, we build a "chain of trust". A key with many signatures generally has a higher reputation than one without any signatures.
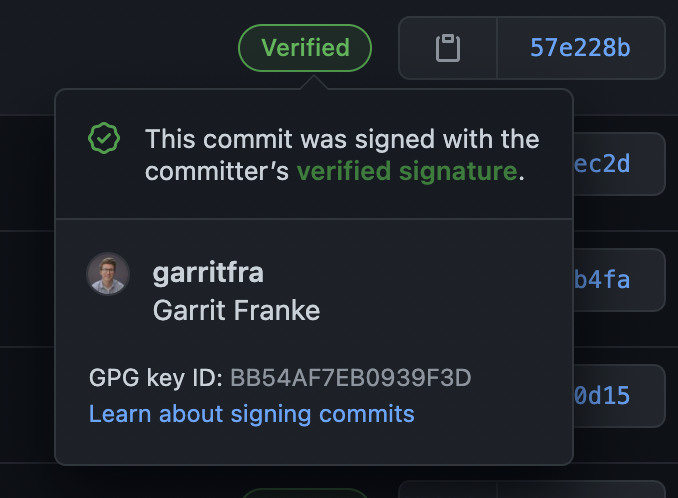
Take Git commits for example. All it takes is a git config user.email "elon@spacex.com" and I can publish code under a different identity. But if everyone on the team signed their work, they will quickly see that a commit is missing its signature, because I'm simply not able to sign my work with Elon Musk's keypair. Only if they see a badge like this, they will know that they can trust it.
Your keypair can also come in handy as a SSH key. Before I knew about PGP, I always had to install one key per machine I was working on. With PGP, you only have a single identity, and therefore you only have to install one key on your servers.
The How
Let's first go over the process of setting up a keypair. For this, we will need the gpg command installed on our system. Usually, this is just a <package manager> install gpg away. Then, we will have to generate a keypair. The quickest way to get one is to use gpg --gen-key, but that will make some quirky assumptions about how you want to use your key.
In PGP, there is this concept of a keyring. A keyring has one master key and many subkeys. It is generally a good idea to have one fat master key that never expires and many small subkeys that last about a year or two. The benefit of structuring your keys like this is that you will always have your trusted keychain, and in case something goes south, E.g. your key gets compromised, you can replace that subkey and keep your identity.
With that in mind, let's create our master key. Run gpg --full-gen-key and follow the instructions. You probably want to use the RSA and RSA (default) option, and a key that is 4096 bits long (remember, this is the fat master key that never expires, so it must be secure). The comment can be left blank, unless you know what you are doing with that field. Enter a strong passphrase! If your private key were to get compromised, this passphrase is your last line of defense. Make it long, hard to crack but still rememberable. If everything went well, your key should be generated. Here's the full example output:
root@c6acc9eb4fd1:/# gpg --full-gen-key
gpg (GnuPG) 2.2.19; Copyright (C) 2019 Free Software Foundation, Inc.
This is free software: you are free to change and redistribute it.
There is NO WARRANTY, to the extent permitted by law.

Please select what kind of key you want:
   (1) RSA and RSA (default)
   (2) DSA and Elgamal
   (3) DSA (sign only)
   (4) RSA (sign only)
  (14) Existing key from card
Your selection? 1
RSA keys may be between 1024 and 4096 bits long.
What keysize do you want? (3072) 4096
Requested keysize is 4096 bits
Please specify how long the key should be valid.
         0 = key does not expire
      <n>  = key expires in n days
      <n>w = key expires in n weeks
      <n>m = key expires in n months
      <n>y = key expires in n years
Key is valid for? (0)
Key does not expire at all
Is this correct? (y/N) y

GnuPG needs to construct a user ID to identify your key.

Real name: Foo
Name must be at least 5 characters long
Real name: Foo Bar
Email address: foo@bar.com
Comment:
You selected this USER-ID:
    "Foo Bar <foo@bar.com>"

Change (N)ame, (C)omment, (E)mail or (O)kay/(Q)uit? O
We need to generate a lot of random bytes. It is a good idea to perform
some other action (type on the keyboard, move the mouse, utilize the
disks) during the prime generation; this gives the random number
generator a better chance to gain enough entropy.
We need to generate a lot of random bytes. It is a good idea to perform
some other action (type on the keyboard, move the mouse, utilize the
disks) during the prime generation; this gives the random number
generator a better chance to gain enough entropy.
gpg: key C8E4854970B7A1A3 marked as ultimately trusted
gpg: revocation certificate stored as '/root/.gnupg/openpgp-revocs.d/4E83F95221E92EDB933F155AC8E4854970B7A1A3.rev'
public and secret key created and signed.

pub   rsa4096 2021-04-07 [SC]
      4E83F95221E92EDB933F155AC8E4854970B7A1A3
uid                      Foo Bar <foo@bar.com>
sub   rsa4096 2021-04-07 [E]
You could stop here and use this key, but let's instead create some subkeys under that key, to make our lives a bit easier. Take the fingerprint of the key (that large number in the output) and run gpg --edit-key --expert <your fingerprint>. Run addkey three times to add these three keys:
Signing key
This key will be used to sign your work (git commits, tags, etc.).
gpg> addkey
- Choose option "RSA (set your own capabilities)", which is currently number 8.
- Toggle E (Encryption) so the "Current allowed actions" only lists Sign and confirm with Q.
- Choose the keysize 2048 (or whatever you prefer).
- Choose the key expire date 1y (or whatever you prefer).
- Confirm twice, then enter your passphrase.
Encryption key
This key will be used to encrypt and decrypt messages.
gpg> addkey
- Choose option "RSA (set your own capabilities)", which is currently number 8.
- Toggle S (Sign) so the "Current allowed actions" only lists Encryption and confirm with Q.
- Choose the keysize 2048 (or whatever you prefer).
- Choose the key expire date 1y (or whatever you prefer).
- Confirm twice, then enter your passphrase.
Authentication key
This key will be used for SSH authentication.
gpg> addkey
- Choose option "RSA (set your own capabilities)", which is currently number 8.
- Toggle S (Signing), E (Encryption) and A (Authentication) so the "Current allowed actions" only lists Authenticate and confirm with Q.
- Choose the keysize 2048 (or whatever you prefer).
- Choose the key expire date 1y (or whatever you prefer).
- Confirm twice, then enter your passphrase.
Now you should have one key per use case: signing, encrypting and authentication, each with an expiration date:
sec  rsa4096/C8E4854970B7A1A3
     created: 2021-04-07  expires: never       usage: SC
     trust: ultimate      validity: ultimate
ssb  rsa4096/C5F71423813B40A0
     created: 2021-04-07  expires: never       usage: E
ssb  rsa2048/52D4D1D19533D8A5
     created: 2021-04-07  expires: 2022-04-07  usage: S
ssb  rsa2048/072D841844E3F949
     created: 2021-04-07  expires: 2022-04-07  usage: E
ssb  rsa2048/42E4F6E376DD92F6
     created: 2021-04-07  expires: 2022-04-07  usage: A
[ultimate] (1). Foo Bar <foo@bar.com>
Save your key, and optionally upload it to one of the many keyservers:
gpg> save

$ gpg --keyserver keys.openpgp.org  --send-keys foo@bar.com
Pro tip: To set a default keyserver (I use keys.openpgp.org, but there are many others out there!), simply add it in your ~/.gnupg/gpg.conf file:
keyserver keys.openpgp.org
People can now import your public key via gpg --keyserver keys.opengpg.org --search-keys foo@bar.com.
We're done with the setup, let's put our keys to use!
Code Signing
To sign your code, you will have to tell git which key to use. Edit your global git options (~/.gitconfig) and add these fields:
[commit]
	gpgsign = true
[tag]
	gpgsign = true
[user]
    name = Foo Bar
	signingkey = 52D4D1D19533D8A5      # Use the ID of your signing key
	email = foo@bar.com
Now, whenever you add a commit, git will sign it with your key. You will have to let your git hosting provider know that this key is yours. Go to your account settings and look for a tab that says "Manage (GPG) keys". Where this tab is depends on your choice of service. Next, run gpg --export --armor <your master key id> and copy the resulting key into the input field of your git hosting service.
Whenever you push a commit, its signature will be checked against that of your account. And that's all the magic!
Encrypting messages
In order to send an encrypted message to someone, you will need his public key. There are numerous ways to obtain a public key of someone. The simplest way is to ask the person for the raw key. If it's in a text file, you can import it like so:
cat some_key.txt | gpg --import
Oftentimes, people will store their keys on a keyserver, just like you have probably done it. To import someones key, simply search for it on a keyserver. I'll use my key here as an example.
gpg --keyserver keys.openpgp.org --search-keys garrit@slashdev.space
Now, your computer should know about my key. To verify that it's actually me you have imported, you can check if the output of gpg --fingerprint garrit@slashdev.space matches my actual fingerprint: 2218 337E 54AA 1DBE 207B 404D BB54 AF7E B093 9F3D.
Optionally, if you trust that the key is actually associated to me, you can sign it. This let's other people know that you trust me, which helps build a so called "chain of trust". A key which has been signed by many people is generally more trustworthy than one that has no signatures.
gpg --sign-key garrit@slashdev.space
Now, let's encrypt a message that only I will be able to read:
printf "If you can read this, you've successfully decrypted this message" | gpg --encrypt --sign --armor -r garrit@slashdev.space
Feel free to send this message to my email-address, I'm happy to chat with you!
Decrypting something is as easy as encrypting something. Say the encrypted message lives in message.txt.asc. If you are the recipient, all you have to do is to run gpg --decrypt message.txt.asc.
SSH
Your PGP key can also be used as an SSH key to authenticate on your servers.
First we need to add the following to ~/.gnupg/gpg-agent.conf to enable SSH support in gpg-agent.
enable-ssh-support
Next, we'll need to tell gpg which key to use. We need to get the so called keygrip of your authentication key and add it to the ~/.gnupg/sshcontrol. The keygrip can be obtained by running gpg -K --with-keygrip. Just copy the keygrip of the authentication key and paste it into the ~/.gnupg/sshcontrol file.
Then, we want the ssh agent to know where to look for the key. Put this in your .bashrc file (or corresponding config):
export GPG_TTY=$(tty)
export SSH_AUTH_SOCK=$(gpgconf --list-dirs agent-ssh-socket)
gpgconf --launch gpg-agent
Then, run ssh-add -l to load the key directly.
To get the public ssh key of your keypair, run this command:
gpg --export-ssh-key foo@bar.com
and add the output to the ~/.ssh/authorized_keys file on your server. When signing in, you should be prompted to enter the passphrase of your key and then authenticated.
Closing thoughts
I hope by now you see the benefits you gain from having a PGP keypair. Whether you find it useful enough to set one up is of course up to you. It is however a good practice to at least sign your git commits as a proof of identity. There are services like Keyoxide that let you keep a "public record" of your key, so that other people can verify your identity more easily. If you set up your key, let me know by sending an encrypted message!
This is post 016 of #100DaysToOffload.